How to Edit Video on the iPhone: Easy Tips & Tricks
Learn how to edit video on the iPhone with our simple guide. Discover native apps and AI tools to create stunning videos effortlessly.
8 Sept 2025

You don't need a fancy studio to edit great videos. The solution is already in your pocket. Learning how to edit video on the iPhone is surprisingly straightforward, letting you trim clips, add filters, and create short movies right from your device.
The built-in apps, like Photos and iMovie, are powerful enough for most of your basic needs. You can get started without downloading a single thing.
Turn Your iPhone into a Powerful Video Editor
Ever look at a polished video online and think you need a high-end computer to do that? That's not the case. The iPhone is packed with capable tools that can turn your raw footage into something you'll be proud to share.
We'll start with the basics, walking through the simple edits you can make in the Photos app. Then, we’ll jump into iMovie to see how you can weave multiple clips together, add music, and start telling a real story.
The Rise of Mobile Editing
Let's face it, we live on our phones. The demand for editing on the go has skyrocketed, thanks to social media and sheer convenience. The numbers back it up. In India, for example, the mobile video editing market was valued at around USD 0.12 billion in 2024 and is expected to climb to USD 0.29 billion by 2033.
This massive growth points to one thing: people want powerful editing tools that fit their mobile lifestyle. Your iPhone is perfectly positioned for this, giving you capabilities that were once reserved for desktops.
From Basic Trims to Creative Projects
Getting comfortable with the apps already on your iPhone is the best way to start. Once you've got the hang of trimming and tweaking, you can tackle more ambitious projects, like figuring out how to make stunning music videos right from your iPhone.
The real magic of iPhone video editing is its speed and accessibility. You can shoot a great moment, edit it on the spot, and share it with the world in just a few minutes, all from one device.
Before we dive into the step-by-step process, here's a quick look at the core functions available on your iPhone.
Core iPhone Video Editing Functions at a Glance
This table breaks down the essential editing you can do right away and shows how AI tools can take those same functions to the next level.
Function | What It Does | Best For | AI Enhancement |
|---|---|---|---|
Trimming & Splitting | Shortens clips or cuts out unwanted sections. | Removing mistakes, tightening up pacing. | AI can automatically identify and remove filler words or long pauses. |
Applying Filters | Changes the colour and tone of your video. | Creating a consistent visual style or mood. | AI-powered colour grading suggests optimal looks based on the scene. |
Adding Music/Audio | Lays a soundtrack or voiceover onto your video. | Setting the emotional tone, adding narration. | AI can auto-duck music during dialogue and suggest royalty-free tracks. |
Adjusting Speed | Creates slow-motion or time-lapse effects. | Emphasising action or condensing long events. | AI can create smooth "speed ramps" for more dynamic transitions. |
These native tools are your foundation. But what happens when you need to create content faster and at a higher volume?
That's where an AI platform like BeHooked can automate the tedious work. Combining your iPhone's built-in tools with smart automation is the key to turning raw footage into engaging content without all the hassle.
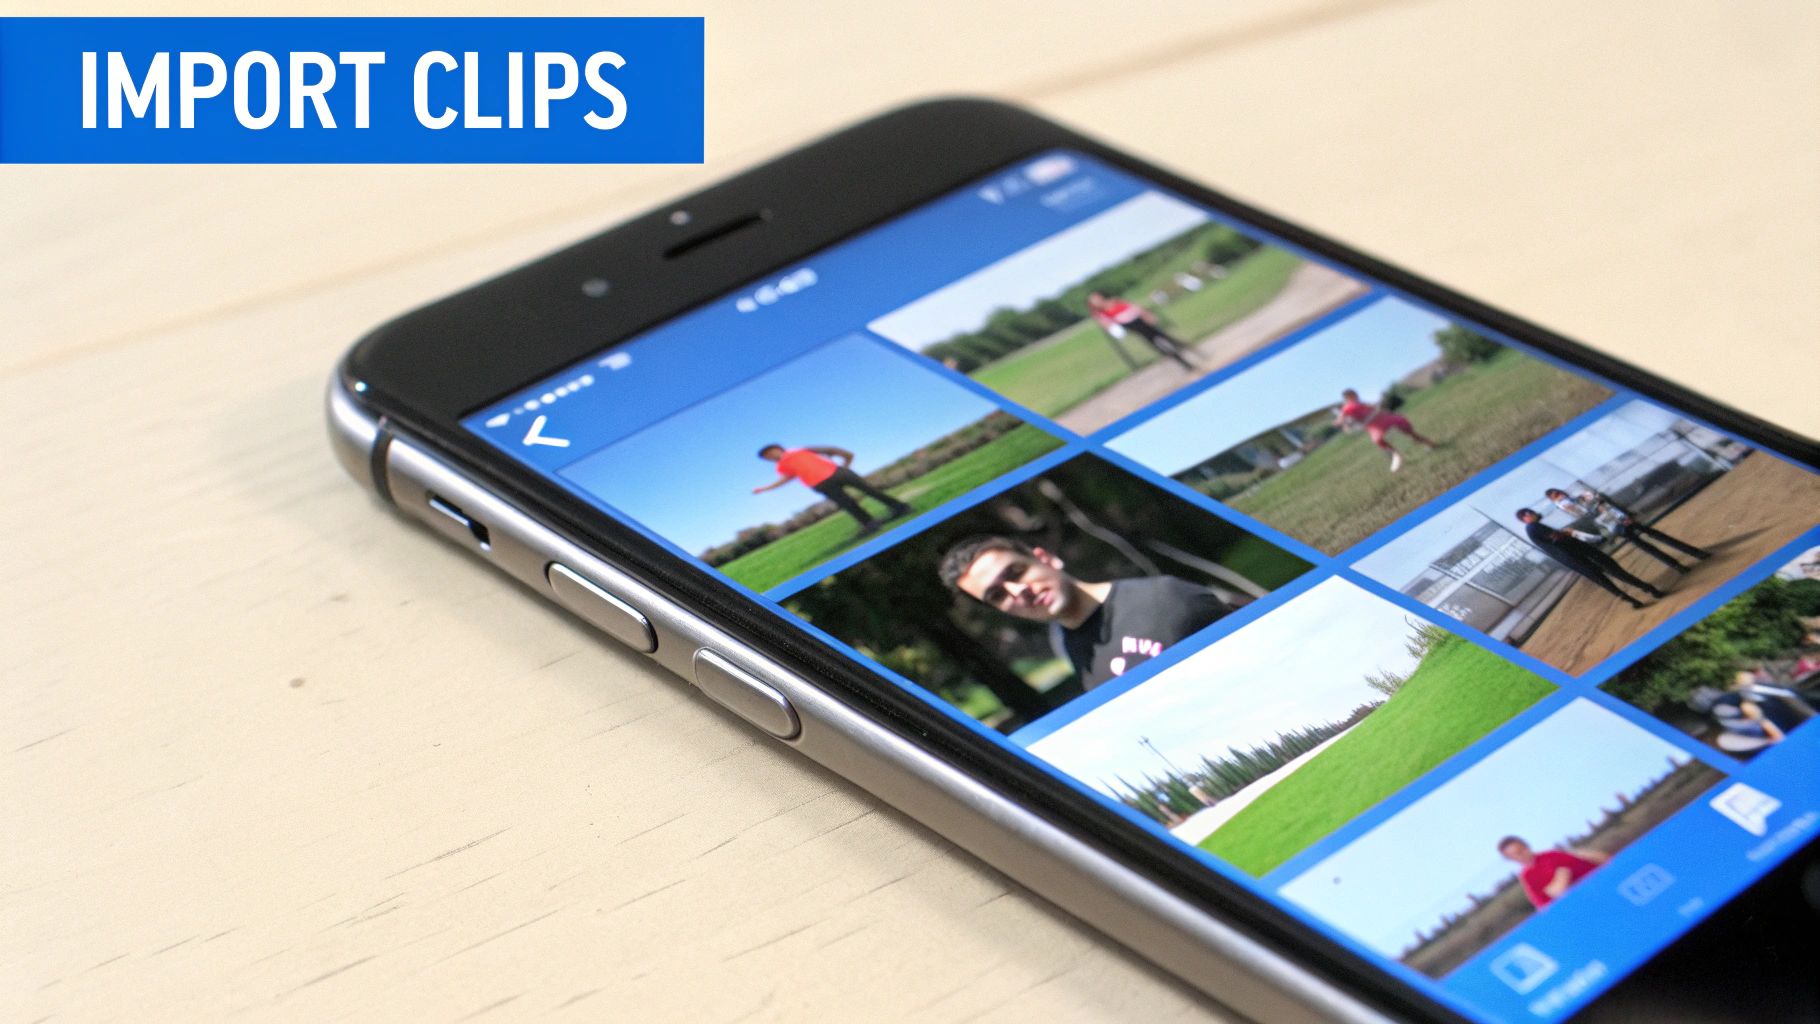
Mastering Quick Edits in the Photos App
Before you jump into more complex apps, get a feel for the powerful tools on your iPhone. The native Photos app is surprisingly capable for making those quick, essential tweaks that take your footage from good to great.
This is the best place to start learning how to edit video on the iPhone. A few simple adjustments can make your videos look cleaner and more professional, without ever leaving the app where they're stored.
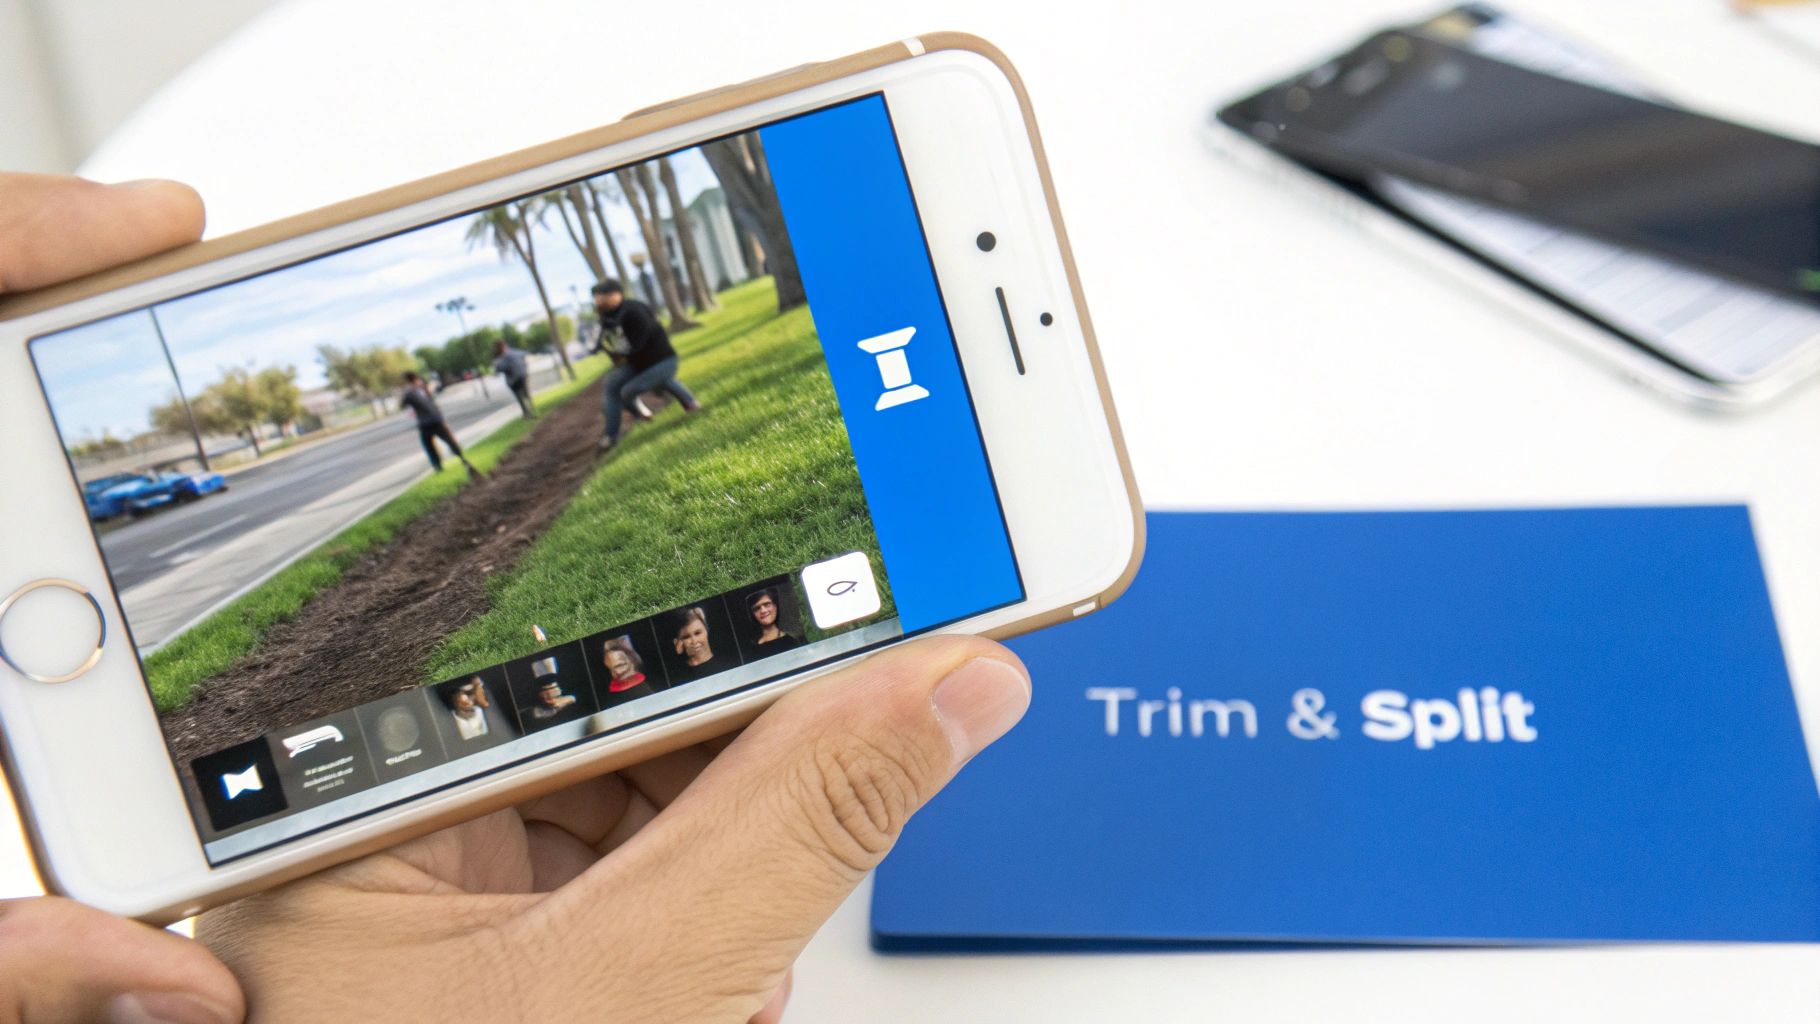
Trimming for Perfect Pacing
The simplest, yet most effective, edit you can make is a quick trim. Almost every video has a little dead air at the start or a lingering shot at the end. That awkward moment before you start talking? Snip it out.
Trimming gets rid of these pauses and makes your content feel tight and engaging from the first second. Just open your video in Photos, tap "Edit," and drag the yellow sliders on the timeline to set your perfect start and end points.
Cropping and Straightening Your Shot
Ever shot a fantastic clip only to realize the framing is just a little off? The Photos app has a simple fix with its cropping and straightening tools. These features are your secret weapon for a polished look.
Straighten: Fix that slightly tilted horizon to make the shot feel more stable and professional.
Crop: Get rid of distracting background clutter and pull your viewer’s focus right where you want it.
Change Aspect Ratio: Instantly resize your video for different platforms. Need a vertical 9:16 for Instagram Reels or a square 1:1 for a grid post? A few taps and you're done.
These little adjustments can completely change the feel of a video, turning a casual recording into something that looks intentionally composed.
Once you get comfortable with these fundamentals—trimming, cropping, and colour correction—you're building a solid foundation. It lets you focus on telling a better story instead of getting stuck on technical fixes later on.
Enhancing Colours and Applying Filters
Beyond framing, you can make your video pop with a few colour adjustments. The Photos app gives you control over brightness, contrast, and saturation. For a travel video, a boost in saturation can make the colours vibrant. If you shot in low light, bumping up the brightness might save the clip.
If you’re looking for a faster fix, try the built-in filters. A single tap can apply a consistent vibe, whether you’re going for a warm, vintage feel or a cool, modern look. These are great skills for how to create tutorial videos where clear visuals are key.
Building a Story with iMovie
When a simple trim won't cut it, it's time to open up iMovie. This is where you can weave multiple clips into a single, compelling story. Apple’s free app is your first step into turning a collection of shots into a video with pacing, emotion, and a clear narrative.
The heart of iMovie is its timeline. Think of it as your digital canvas where you drag video clips, photos, and audio into place. This isn't just about putting clips back-to-back; it's about controlling the rhythm and flow of your story.
Arranging Clips and Pacing
The sequence of your clips dictates your story's pace. For a travel vlog or a workout video, string together a series of short, snappy cuts to build excitement.
On the other hand, letting a shot linger gives viewers a moment to breathe and connect. Think of it like building a sentence: each clip is a word, and the timeline is where you arrange those words to make a point.
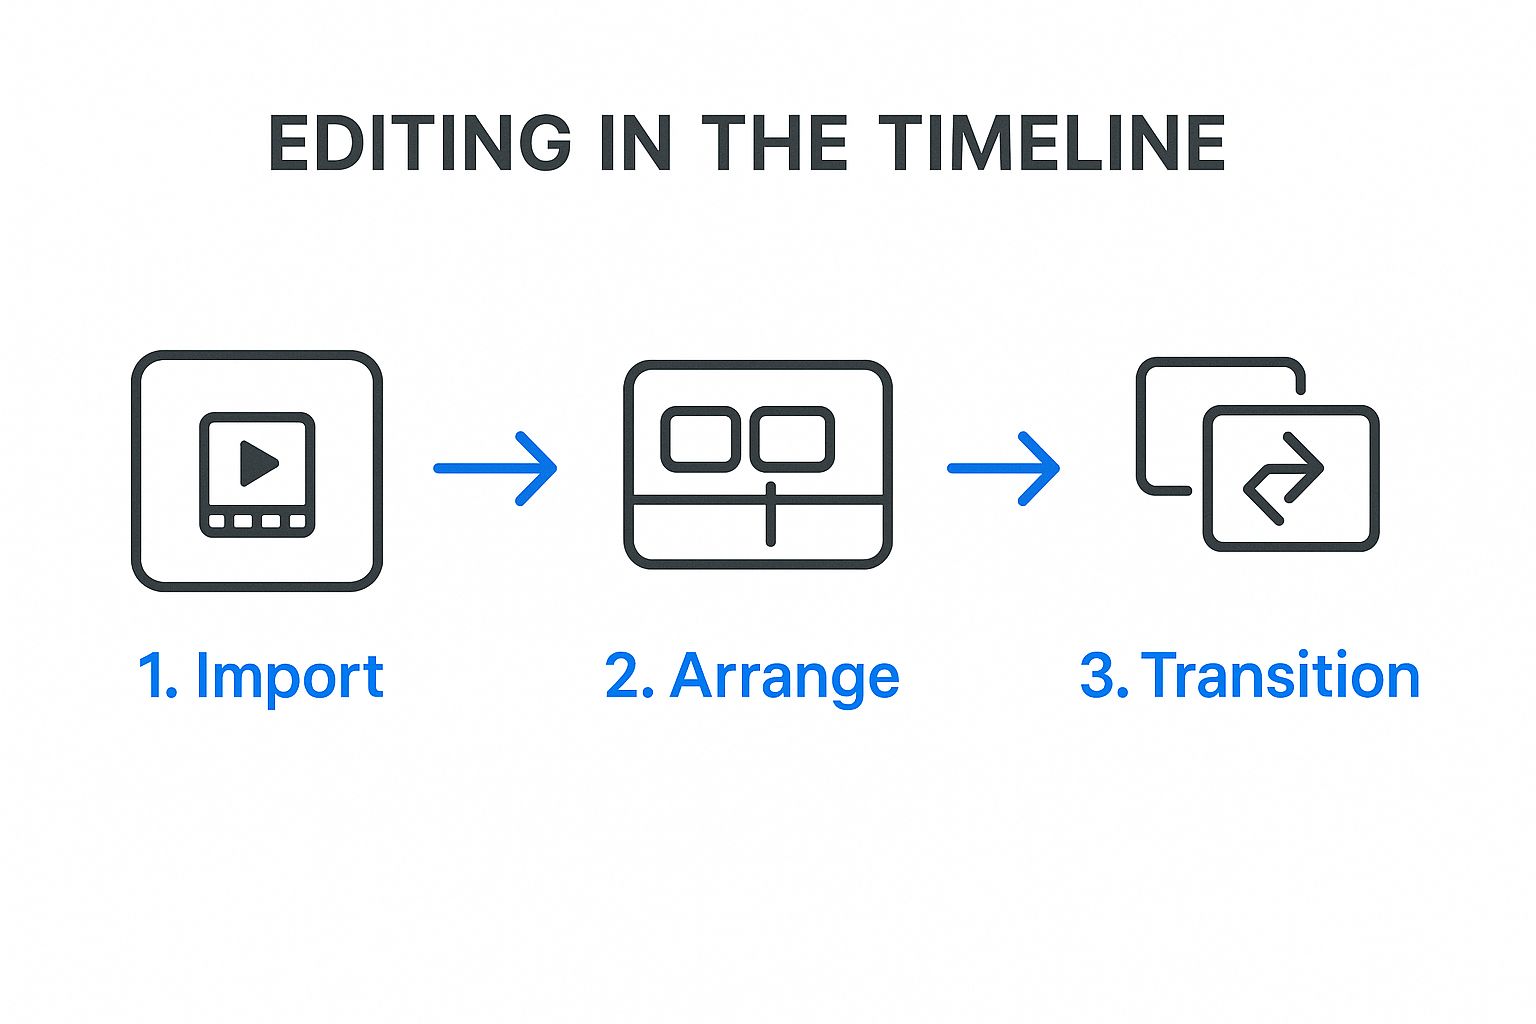
This visual breaks it down: import, arrange, and transition. Once you get a feel for this simple flow, you're well on your way to creating much more polished videos right from your phone.
Adding Titles and Transitions
Transitions are the glue that holds your scenes together. A straight cut is often best, but a gentle cross-dissolve can suggest the passage of time. iMovie has many options, but use them sparingly to avoid a dated look.
Titles are crucial for giving your viewers context. Use them to introduce a speaker, set the scene, or highlight key information.
By thoughtfully combining your clip arrangement with well-placed titles and subtle transitions, you’re no longer just showing clips—you're actively guiding the viewer's journey. That’s what real video storytelling is all about.
Incorporating Music and Sound
Never underestimate the power of audio; it's easily 50% of the viewing experience. iMovie lets you add background music from its built-in library of royalty-free tracks, or you can import your own.
You have fine-tuned control. When someone is speaking, you can easily lower the volume of the background music to make sure their dialogue is clear. Getting your sound mix right is one of the biggest things that separates amateur videos from professional content. For more on this, it's worth understanding how AI shapes video storytelling for brands.
Let AI Automate Your Editing Workflow
Once you’ve gotten the hang of the manual tools, you’ll probably start thinking, "There has to be a faster way." Trimming clips, adding effects, and syncing audio can eat up your time. This is where artificial intelligence changes the game.
Imagine a tool that could instantly pinpoint the most engaging moments in your footage. That's what platforms like BeHooked do. They use AI to analyze your raw footage, pull out the highlights, and automatically stitch them into a dynamic video.
Let AI Handle the Heavy Lifting
The real magic of AI is taking over the repetitive tasks. It frees you up to think about the bigger picture—your story and your creative spark.
Here are a few ways AI can improve your workflow:
Automatic Subtitles: AI can generate accurate captions in minutes, making your content more accessible.
Trending Audio Suggestions: AI can suggest trending music and sounds that match the vibe of your video.
Eye-Catching Effects: With a single tap, AI tools can apply slick transitions, animated text, and cool visual effects.
Our article on the 7 ways AI video tools save time for small business breaks down even more ways automation can help. The point isn't to replace your creativity; it's to supercharge it.
Overcoming Mobile Editing Limitations
As powerful as iPhones are, they still have their limits. The biggest hurdle for mobile editing remains processing power. Trying to render a complex video can slow your phone to a crawl.
This is where cloud-based AI platforms really shine. By pushing all the heavy processing to powerful servers, BeHooked ensures your iPhone doesn’t get bogged down. You can create sophisticated, high-quality videos without your phone overheating.
This hybrid approach gives you the best of both worlds: the convenience of shooting on your iPhone combined with the power of cloud-based AI. You can explore advanced AI video editing tools to take your workflow even further.
Pro Tips for Polished iPhone Videos
A great edit starts long before you open an editing app. The quality of your raw footage sets the stage. Knowing how to edit video on the iPhone is one thing, but learning how to shoot better video is the real secret.
Even the best software can't fix shaky, poorly lit shots. If you nail a few key things during filming, the editing process will be much easier and your final video will look far more cinematic.
Focus on Lighting and Composition
Good lighting is non-negotiable. You don’t need a fancy studio setup. Simply filming near a window for natural light can instantly improve your footage. Avoid harsh overhead lights that cast weird shadows.
Composition is just as important. Try experimenting with the rule of thirds. Imagine your screen has a 3x3 grid. Placing your subject along those lines creates a shot that feels more balanced and professional.
Achieve Stable Footage and Clean Audio
Nothing screams "amateur" faster than shaky footage. Hold your phone with two hands and tuck your elbows in close to your body. For even smoother shots, rest your phone on a stable surface.
Don't forget the audio. If people can't hear you, they'll tune out. Find a quiet spot to record, away from background noise. Speaking clearly towards your iPhone’s microphone will get you the crispest sound. Our guide on how to make professional videos has more tips.
Getting the basics right during filming—stable shots, clean audio, and good light—saves you countless hours in the editing suite. It's the foundation upon which every great video is built.
Polish with Colour and Export at High Quality
Once your clips are in place, a bit of colour grading is the final touch. A simple tweak to warmth, contrast, or saturation can change the mood and pull everything together.
Finally, always export your video in the highest quality possible. Social media platforms compress video, so starting with a high-resolution file helps it stay sharp. Aim for 1080p or 4K. To level up your toolkit, explore the best video editing software for social media.
Conclusion: Your Pocket-Sized Editing Studio
You've got the essentials down. You know how to make quick edits in your iPhone's Photos app and piece together a compelling story using iMovie. That's a huge step. With a tool like BeHooked in your corner, you can even automate the heavy lifting.

The best advice now is to just get in there and start making stuff. There’s no substitute for practice. The more you experiment with these tools, the more you'll discover a workflow and a style that feels genuinely yours. Don’t be shy about trying new techniques.
You're holding a powerful video production studio in the palm of your hand. All that’s left is to start telling your stories. Go on, bring those ideas to life.
Frequently Asked Questions
Can I really edit 4K video on my iPhone?
Yes, you absolutely can. Recent iPhone models, especially the Pro versions, are powerful enough to handle shooting and editing 4K video. Both the Photos app and iMovie support 4K files, so you can trim and export without losing quality. Just be aware that 4K files are large and can consume a lot of storage and battery.
Do I need any special apps to start editing?
Not at all. For most beginners, the combination of the built-in Photos app and iMovie is more than enough. You can handle all the essential tasks—trimming, color correction, adding titles, and incorporating music—without ever visiting the App Store. They are the perfect tools for learning the fundamentals of video editing.
How can I make my iPhone videos look more professional?
Focus on the basics before you even start editing. Shoot with good lighting, use the rule of thirds for better composition, and ensure your footage is stable. Clean audio is also critical, so record in a quiet environment. Polishing your video with consistent color grading and exporting in high quality (1080p or 4K) will also make a significant difference.
Ready to let AI do the heavy lifting and turn your raw footage into polished videos? BeHooked takes your ideas and automatically creates shareable content in minutes. Try it now and see the magic for yourself.