Fix Your Sound with a Video Audio Booster
Tired of bad sound? Learn how a video audio booster can give you crystal-clear audio. Get easy, practical tips to make your videos sound professional.
7 Oct 2025

Let's be honest, we've all done it. You click on a video with a great thumbnail and a catchy title, but the second it starts, you can't hear what's being said over the buzzing, hissing, or general background chaos.
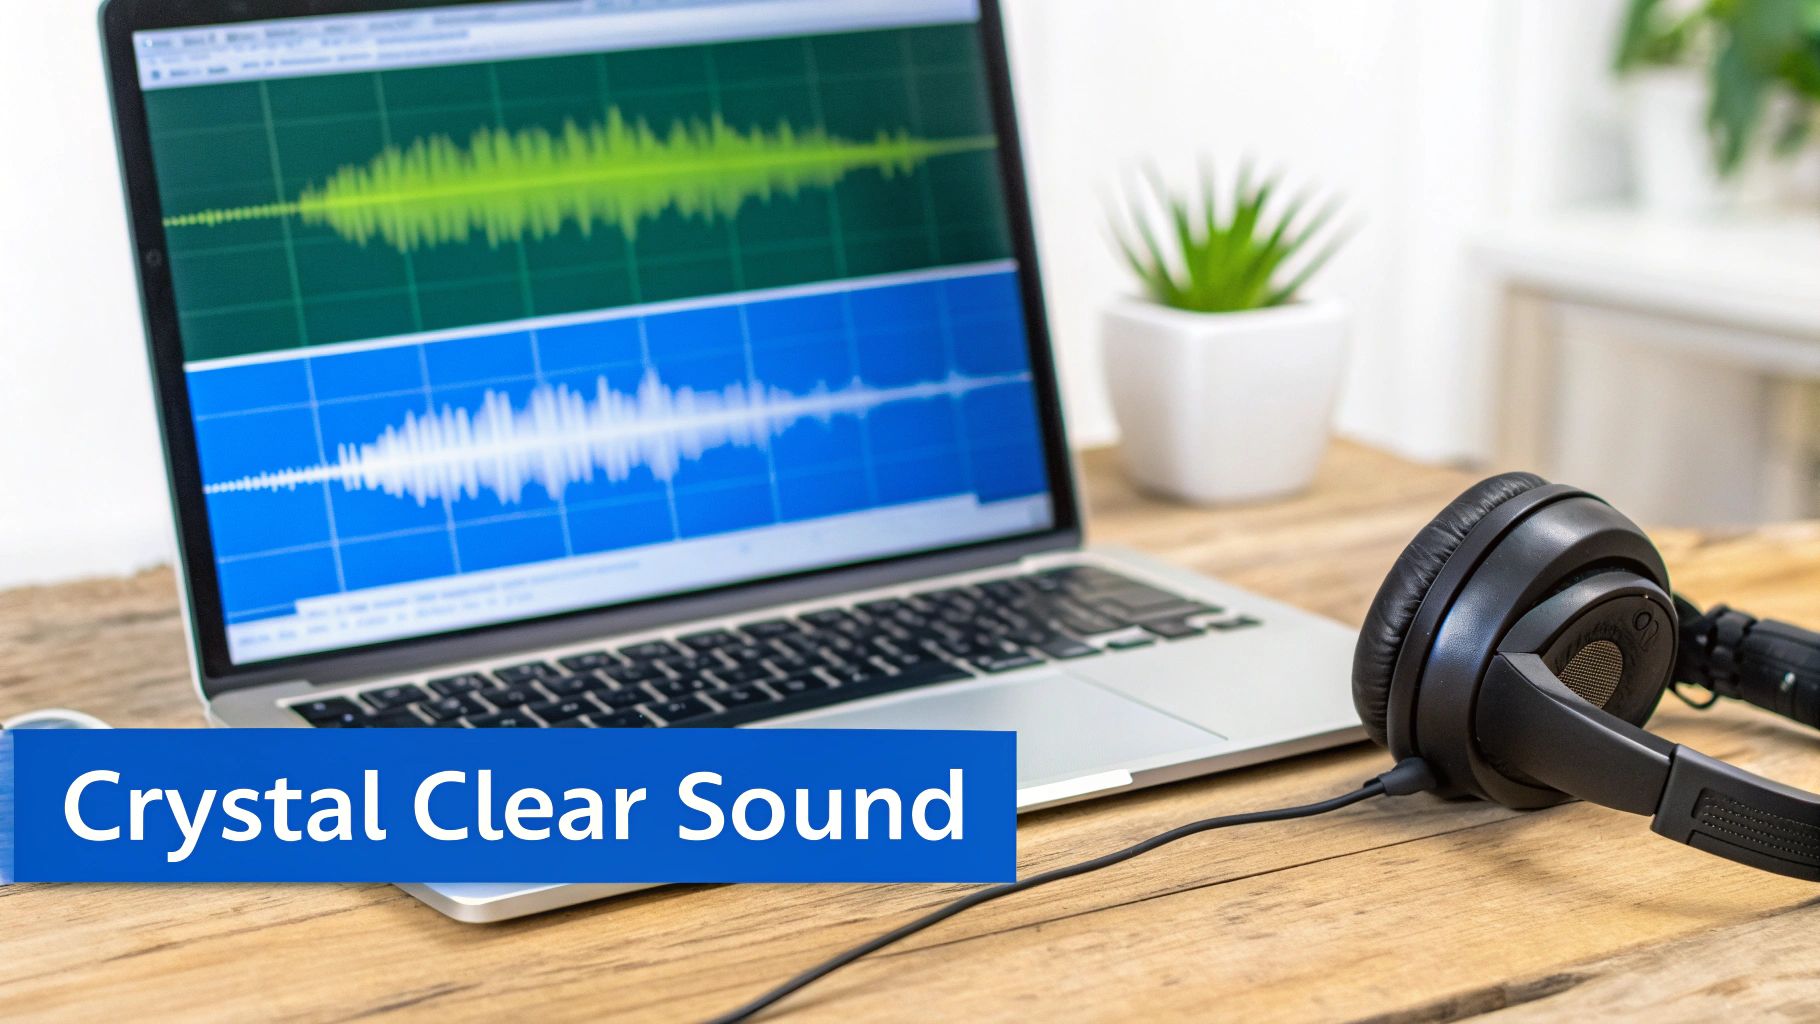
Even the most beautifully shot 4K video is unwatchable with bad sound. This is exactly why having a good video audio booster in your toolkit is a non-negotiable for any creator. It's the magic wand that turns muddy, distracting audio into something crisp, clear, and professional that actually keeps people watching.
Why Good Audio Is Your Video's Secret Weapon
Think about the last video that really hooked you. Was it just the visuals? Probably not. Clear, immersive audio is what pulls you in and makes you feel connected to the content. It’s the invisible foundation of a great viewing experience.
Bad audio, on the other hand, is an instant turn-off. It’s like a wall between you and your audience. If they have to strain to understand you, or if they’re distracted by a loud air conditioner in the background, they're going to click away. It doesn't matter how great your message is if no one can hear it properly.
The Real Impact of Clear Sound
Boosting your audio isn't just about cranking up the volume. It’s about creating balance and clarity. It’s the difference between a shaky, amateur phone recording and a smooth, cinematic shot.
When your audio is right, every word lands, every point is clear, and the emotional tone of your video comes through perfectly. This isn't just a "nice-to-have" anymore; it's a professional standard.
The professional audio-visual market in India was already valued at $101.3 million in 2024 and is expected to jump to a staggering $146.23 million by 2033. A massive driver for this is the boom in digital marketing and e-commerce, where top-notch audio is essential for keeping customers engaged.
If you want to dive deeper into these numbers, you can check out this insightful report from IMARC Group. What does this mean for you? The bar for audio quality is higher than ever. Thankfully, you don't need a degree in sound engineering or a fancy studio to meet it.
Key Takeaway: Viewers will forgive slightly grainy footage, but they will almost never stick around for bad audio. Polishing your sound is a direct investment in keeping your audience engaged.
The good news is that modern tools, especially those with AI built-in, make fixing common audio headaches incredibly simple.
This is what a modern, AI-powered audio enhancer looks like. Notice how it's not a complicated dashboard with dozens of confusing sliders? It's just a simple "Enhance speech" button.
This single click can do the work of what used to take a professional hours, making pro-level sound a reality for everyone.
Figuring Out What's Wrong With Your Audio
Before you can really get the most out of a video audio booster, you have to play detective for a minute. The first, most important step is figuring out exactly what's making your audio sound bad.
So many creators get frustrated with their sound quality, but most of the time, the problems fall into just a few common buckets.
Think of this as a quick check-up for your video's sound. Once you can put a name to the problem, you'll know exactly which tool or setting you need to fix it. Let's look at the usual suspects that can drag down an otherwise fantastic video.
That Annoying Background Noise and Hum
Probably the most common enemy of clean audio is background noise. I'm talking about that constant, low-level sound that creeps into your recordings—the whir of an air conditioner, the faint rumble of traffic outside, or even the buzz from your own computer gear.
It might not seem like a big deal, but that noise is incredibly distracting for your viewers. It puts a wall between them and your message, making their brains work overtime just to hear what you're saying.
If this is your main issue, our guide on video background noise removal has some great techniques for dealing with it directly.
Another major culprit is reverb, which is just a fancy word for echo. This happens when you’re recording in a space with lots of hard, flat surfaces, like bare walls or a hardwood floor. Your voice bounces around the room and creates a hollow, distant sound that can feel really unprofessional.
Expert Tip: A simple way to check for reverb is to stand in your recording space and clap your hands once, loudly. If you hear the sound hang in the air and slowly fade away, you've got an echo problem. You'll need to fix this either by treating your room or by using an audio tool later on.
Problems with Vocal Clarity and Volume
Sometimes, the issue isn't what's happening in the background, but how the voice itself was recorded. These kinds of problems directly affect how clear and listenable your dialogue is, which can make or break the entire viewing experience.
Here are a few voice-specific gremlins to listen for:
Plosives: You know that jarring "pop" sound when someone says a 'p' or 'b' sound too close to the mic? That’s a plosive. It's basically a burst of air hitting the microphone diaphragm, and it’s super unpleasant for the listener.
Sibilance: This is the sharp, hissing sound that can happen with 's' or 't' sounds. A little bit is natural, but when it's too harsh, it can be really piercing and fatiguing to listen to.
Inconsistent Volume Levels: This is a classic one. The speaker's voice goes from a whisper to a shout, forcing viewers to constantly ride their volume controls. This usually points to poor mic technique or a need for audio compression.
Nailing down whether your problem is environmental (like a noisy fridge) or related to the vocal performance (like plosives) is the whole game. Once you know what you're fighting, you can use the right tools to apply a targeted fix and turn that messy audio into something polished and professional.
A Hands-On Guide to Polishing Your Audio with AI
Alright, let's get into the good stuff. Theory is one thing, but seeing how a modern video audio booster works in practice is where the magic happens. This isn't some complex, jargon-filled process; it's a straightforward workflow you can use right away to make your audio sound infinitely better.
Your first move is usually the easiest. Once you’ve dropped your video into the tool, you’ll likely see a big, friendly button for one-click AI enhancement. Hitting this tells the AI to scan your audio and apply a whole host of fixes.
This single click can instantly solve about 80% of common problems, like weak volume or a subtle background hum. Think of this initial AI pass as your foundation. It handles the heavy lifting, clearing out the major issues so you can get down to the fine-tuning.
This is one of the most powerful features you'll find in the top AI video editing tools available today.
Tackling Annoying Background Noise
With the basics sorted, it’s time to hunt down any stubborn background sounds. Most AI tools come with a dedicated noise reduction feature, but this isn't your old-school, clunky filter that leaves your voice sounding like a robot. Modern tools are much smarter.
Let's say you recorded a great take, but you can hear your computer fan buzzing away. A smart noise reduction tool lets you pinpoint that specific humming frequency and gently dial it back, all without touching the natural warmth of your voice.
The secret here is to be subtle. You want to reduce the noise, not obliterate it entirely. That’s how you keep things sounding natural.
This infographic gives a great overview of how an AI audio booster streamlines this whole process, from the initial scan to the final, polished output.
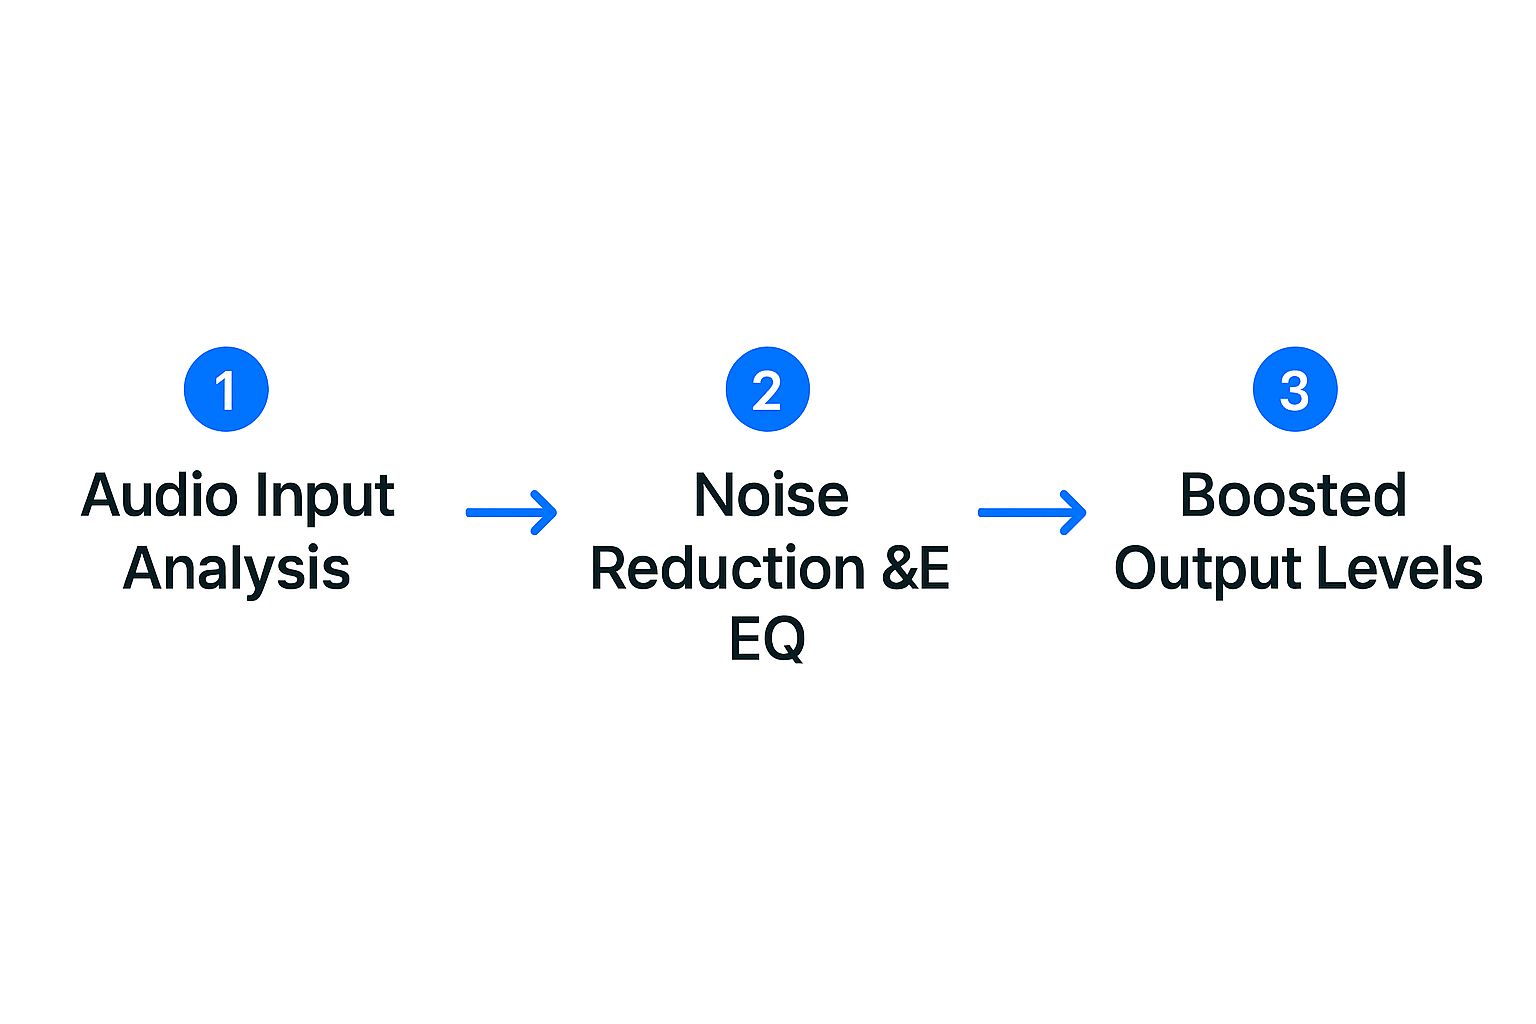
As you can see, the workflow makes perfect sense. You clean up the audio first, then you give it presence and punch.
Shaping Your Sound with an Equaliser
Next up, we have the equaliser (EQ). The name might sound technical, but an EQ is just a tool for adjusting the volume of different sound frequencies. It’s basically a super-powered version of the bass and treble controls on your stereo.
For vocals, a few simple tweaks can work wonders:
Scoop Out the Mud: Try lowering the frequencies around the 200-400 Hz mark. This is often where "muddy" or "boomy" sounds live, and clearing them out instantly improves clarity.
Give it Some Presence: A small boost somewhere between 2-5 kHz will help your voice cut through. This is the sweet spot for vocal presence and intelligibility.
Add a Little Air: Gently lifting the frequencies above 10 kHz can add a touch of crispness, making the audio sound much more professional.
These small adjustments can make a voice stand out beautifully, and it's a much better approach than just cranking up the overall volume. This is especially important for viewers on mobile, where good audio is non-negotiable.
Making Sure Every Word Counts
The final piece of the puzzle is compression. A compressor’s job is to even out the volume of your audio. It makes the quiet bits a little louder and the loud bits a little quieter, reducing what’s known as the "dynamic range."
Why does this matter? Well, without it, your audience might have to turn their volume way up to hear you whisper, only to get their eardrums blasted when you laugh a moment later. A touch of compression smooths everything out, creating a much more consistent and professional listening experience from beginning to end.
Pro Techniques for a Polished Final Mix
Once you’ve cleaned up the main audio problems, it’s time for the final touches. These are the steps that really separate the good from the great, giving your sound that professional, broadcast-quality feel that holds a listener's attention.
It's tempting to stop after just running a noise reduction filter, but spending a few extra minutes here can make a massive difference. Let's look at a few powerful techniques that can take your mix from simply clean to truly captivating.
Taming Harsh Sibilance with a De-Esser
Ever listened back to a recording and heard a piercing hiss on words with 's' or 'sh' sounds? That's called sibilance, and it can be really distracting for your audience. A De-Esser is the perfect tool for this job. It’s designed to pinpoint and soften only those harsh frequencies, leaving the rest of your dialogue untouched.
Using one is usually pretty straightforward. You can start with a preset for a male or female voice and then tweak a single slider—often called 'threshold' or 'amount'—until those sharp sounds are smoothed out. The goal isn't to get rid of the 's' sound entirely, just to make it blend in naturally.
Creating Space with Subtle Reverb
Reverb is just the sound of audio waves bouncing around a room. Overdo it, and your audio sounds like it was recorded in a cave. But use just a tiny, almost imperceptible amount, and you can add a sense of warmth and space to your voice.
A common mistake is adding way too much reverb. The trick is subtlety—you should only really notice it's there when you turn it off.
I usually start with a 'small room' or 'vocal plate' preset and then immediately pull the mix level down to around 5-10%. This tiny touch stops a dry vocal from sounding flat and gives it just enough character to feel present and professional.
Perfecting the Music and Dialogue Balance
One of the best tricks for a polished final mix is audio ducking. This automatically dips the volume of your background music whenever you speak, then brings it back up when you stop. It’s what creates that dynamic, professional flow and ensures your voice is always front and centre.
To make sure your mix is on point and you stay out of legal trouble, it's always a good idea to source your tracks from reputable non-copyright music sites. Mastering skills like ducking is a game-changer.
If you want to level up your entire production workflow, our video editing tutorial is packed with practical tips. Thankfully, most video editors and AI audio tools have built-in ducking features that make this process incredibly simple.
As a final step, you'll want to use a Limiter on your main audio track. A limiter is like a safety net that prevents your audio from clipping or distorting while also boosting the overall loudness. This makes sure your video sounds powerful and clear on any device.
How to Record Better Audio from the Start
Let's be honest, the best "audio booster" is the one you never have to use. While the AI tools we've discussed are fantastic for polishing your final cut, nothing beats capturing clean, crisp audio right from the source.
Spending a few extra minutes getting your audio setup right before you hit record will save you hours of frustration in post-production. Think of it as the single best investment you can make in the quality of your video.
Choose Your Microphone Wisely
The microphone built into your smartphone has come a long way, but it's just not cut out for high-quality recording. It's designed to pick up everything around you, not just your voice. The first, and most important, step towards better sound is getting a dedicated external microphone.
The right mic really depends on what you’re filming.
Lavalier Mics: You've seen these little clip-on mics. They're perfect for interviews or talking-head videos because they isolate your voice and minimise room noise.
Shotgun Mics: These are the go-to for vloggers and anyone shooting on the move. They mount directly onto your camera and are designed to capture sound from whatever you're pointing at.
USB Mics: If you're recording voiceovers, podcasts, or anything else from your desk, a good USB mic is your best friend. They offer fantastic quality for a stationary setup.
Control Your Recording Environment
You don’t need a soundproofed studio to get great audio. Your main goal is simply to cut down on echo and kill any distracting background noise. Find the quietest room in your house—away from humming refrigerators, street traffic, or noisy neighbours.
Sound loves to bounce off hard, flat surfaces like bare walls and hardwood floors. This creates that awful echo, or reverb, that instantly makes a recording sound amateurish. The fix? Soften the room with things you already have.
Pro Tip: I've seen people get amazing results by just hanging a few thick blankets on the walls or tossing some pillows in the corners of a room. It might look a bit strange, but it does wonders for absorbing those sound reflections.
Get Your Levels Right to Avoid Clipping
If you take only one piece of advice from this section, make it this one. Before you actually start recording your content, do a quick soundcheck and watch your audio levels. When you speak at a normal volume, you want the meter to bounce nicely in the yellow, somewhere around -12dB to -6dB.
If that meter ever hits the red, your audio is clipping. This is nasty distortion that occurs when the sound signal is too loud for your gear to handle. It sounds like a horrible crackle, and it's practically impossible to fix later, even with the smartest AI tools.
For a deeper dive into the technical side of recording, our guide on how to record a video on YouTube is a great place to start. Getting this right is non-negotiable, especially in rapidly growing markets like India's podcasting scene.
With over half of India's internet users tuning into podcasts, clear audio is absolutely essential for cutting through the noise. You can discover more insights on the Indian podcasting market here.
Your Path to Professional Video Sound

Here's the good news: professional-sounding audio isn't just for big-budget studios anymore. It's something every single creator can achieve right from their desk. It all boils down to knowing what to listen for, letting a solid video audio booster do the hard work for you, and then adding those final human touches.
Of course, the best audio starts with the best recording. Getting it right at the source will always save you a headache in post-production. If you're serious about taking your entire production quality up a notch, pairing great audio with stunning visuals is the way to go.
Upgrading your gear, like finding the best drones for cinematography, can make a huge difference. And if you're looking to dive deeper into vocal work, we've got more tips on how to add voice to video over at https://behooked.co/blogs/how-to-add-voice-to-video.
Conclusion
Mastering your video's sound is no longer an optional step—it's essential for keeping your audience engaged. By starting with the cleanest possible recording and leveraging the power of a modern video audio booster, you can eliminate distracting noise, enhance vocal clarity, and deliver a polished, professional product. Remember to identify your audio issues, use AI tools for the heavy lifting, and apply finishing touches like EQ and compression. This approach ensures your message is heard loud and clear, making your content stand out in a crowded digital landscape.
Frequently Asked Questions
Can AI really fix badly recorded audio?
AI tools are fantastic at removing common issues like background hum, fan noise, and light chatter. However, they can't perform miracles. If the audio is heavily distorted or the dialogue is completely drowned out by a loud, sudden noise, re-recording is often the best solution. For most everyday audio problems, AI provides a significant improvement.
Do I need to buy expensive software to boost my audio?
Absolutely not. While professional suites are powerful, many free and affordable web-based AI tools can deliver excellent results for creators. These tools are perfect for removing background noise, enhancing speech, and leveling volume without a steep learning curve or high cost, making professional sound accessible to everyone.
How loud should my final video audio be?
The goal is to match the loudness of other content on platforms like YouTube so viewers don't have to adjust their volume. The industry standard is to aim for around -14 LUFS (Loudness Units Full Scale). Many video audio booster tools have simple presets like "YouTube" that will automatically set your audio to this optimal level for you.